How to Fix an Office Chair That Keeps Sinking?

Time:2026-09-18 Author:Oliver
0%

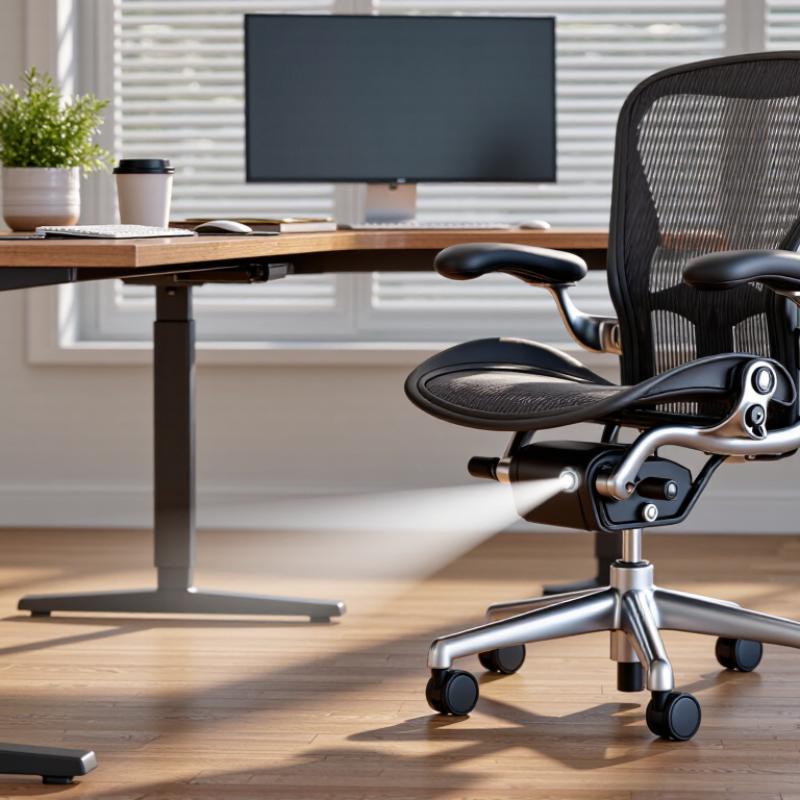
An office chair that slowly drops during the workday is more than an irritating inconvenience. It can place your desk, monitor, and arms at uncomfortable heights. The problem usually involves the pneumatic gas cylinder, but loose parts or incorrect adjustments can also contribute. This guide explains Why is my office chair sinking and how to fix it through practical, careful checks. You will learn how to identify the cause before buying replacement parts.

Begin by sitting in the chair and noting when it lowers. Does it sink immediately, or only after several hours? That detail matters. Inspect the height lever, cylinder, seat plate, and five-star base for visible movement. A flashlight can reveal a loose bolt or cracked plastic collar beneath the seat. Do not open or puncture the gas cylinder. It is pressurized and should be replaced, not repaired internally. Manufacturer instructions and a qualified chair technician remain the most reliable references, especially for heavy-duty models.

Some fixes are simple. Tightening accessible bolts, cleaning the control mechanism, or checking the lever alignment may solve the problem. If the chair still descends under normal weight, the cylinder has probably worn out. Replacement requires matching the cylinder’s diameter, lift range, and mounting style. Measuring twice helps, although mistakes still happen. An inexpensive part may fit poorly and create new instability. This guide will compare replacement methods, essential tools, safety precautions, and signs that professional assistance is the better choice. Your chair should stay level, stable, and comfortable throughout a full working day.
How to Fix an Office Chair That Keeps Sinking?

Identify a Failed Gas Lift Against ANSI/BIFMA X5.1 Durability Criteria

How to Fix an Office Chair That Keeps Sinking?

A sinking office chair usually points to a failed pneumatic gas lift. Press the height lever while removing your weight. If the seat still drops, the cylinder is no longer holding pressure. Check for oily residue, a bent piston, or unusual side-to-side movement. A loose lever can imitate failure, so inspect the control mechanism first. I have seen users replace the cylinder unnecessarily.

ANSI/BIFMA X5.1 provides a more reliable benchmark than appearance alone. Its durability procedures include repeated loading, functional checks, and stability evaluation. The standard specifies 100,000 seat cycles and 120,000 back cycles for relevant durability tests. These cycles do not prove every gas lift will last equally. They show how a complete chair should perform under controlled stress. A worn cylinder may pass a visual inspection and still fail under a 275-pound test load.

BIFMA’s North American business furniture market reports place annual industry shipments in the low tens of billions of dollars. That scale makes consistent testing important. However, market data cannot diagnose one chair. Measure the seat height before and after sitting for ten minutes. A drop of several centimeters indicates progressive pressure loss. Do not drill, heat, or open the cylinder. Replace it with a compatible, safety-rated unit, then test the chair on a level floor. My practical mistake was trusting a cylinder because it looked clean. Appearance is weak evidence.

Measure the Cylinder and Match DIN 4550 Class 3 or Class 4

An office chair that keeps sinking usually has a worn gas cylinder. The seat drops slowly after you sit down. In many cases, tightening the height lever will not repair it.

Measure before ordering a replacement. Remove the cylinder, if possible, and measure its body diameter, overall length, exposed rod, and tapered ends. Record the distance from the seat mechanism to the base. A ruler can work, but calipers give better results. I once measured only the visible shaft and bought the wrong part. That mistake cost more time than the replacement itself.

Then match the cylinder with DIN 4550 Class 3 or Class 4 specifications. Class 3 often suits standard office loads, while Class 4 generally offers a higher tested load range. However, the class alone does not guarantee compatibility. Confirm the rated load, stroke length, cone sizes, and mounting dimensions. Check the chair’s mechanism and five-star base as well. The cylinder must fit both ends firmly. Never drill, cut, heat, or force a pressurized cylinder. Use a proper removal tool, eye protection, and a stable work surface. If the measurements conflict, pause and recheck them. Small errors matter.

Remove the Seat and Base Without Opening the Pressurized Cylinder

How to Fix an Office Chair That Keeps Sinking?

A sinking chair usually has a worn gas lift, not a loose height lever. The safest repair starts with removing the seat and base without opening the pressurized cylinder. OSHA recommends a stable, adjustable chair with a five-leg base for workstation safety. The Bureau of Labor Statistics reported that musculoskeletal disorders represented about 27% of private-industry days-away-from-work cases in 2023. A stable chair matters.

Lower the chair fully, then unplug nearby equipment and clear the floor. Turn the chair upside down on a folded blanket. Support the seat, and remove the bolts connecting the seat plate to the underside. Keep every washer in a small tray. They disappear easily. Do not twist, drill, heat, or cut the cylinder. It can release stored pressure unexpectedly.

Next, separate the five-star base from the cylinder. Hold the base firmly and tap around the cylinder collar with a rubber mallet. Rotate the base between taps. A wooden block can protect the metal edge. Avoid striking the shiny cylinder shaft. Once the base drops free, inspect the socket for cracks or distortion. I have found that repeated hard impacts can damage older plastic bases, so patience is better than force. If the cylinder remains tight, stop and use a qualified repair service rather than opening it.

Install the Replacement Lift Using Its Rated Load Capacity

How to Fix an Office Chair That Keeps Sinking?

A chair that slowly drops usually has a worn gas lift. Tightening the height lever will not restore lost pressure. Replace the lift, and match its rated load capacity carefully. This rating should support your body weight, seat, mechanism, and movement during daily use. A barely adequate rating may fail sooner than expected.

Measure the old lift before ordering. Check its overall length, cylinder diameter, base connection, and seat connection. Not every replacement fits every chair. I once assumed two cylinders were interchangeable because they looked similar. They were not. The seat sat too high, and the taper joint never seated correctly.

Remove the seat and five-star base on a stable work surface. Wear gloves, protect the floor, and follow the replacement part’s instructions. Do not drill, cut, or heat a gas cylinder. A rubber mallet and penetrating oil can help release a stuck joint. Keep fingers away from pinch points. Insert the new lift firmly, then reinstall the base and seat. Test the chair at its lowest height first. Sit down slowly and check for wobbling, sudden movement, or continued sinking. If the chair feels unstable, stop using it. Recheck the connections and confirm the lift’s rated capacity. A small mistake here can become a painful one.

Test Height Locking and Stability Before Regular Use

How to Fix an Office Chair That Keeps Sinking?

A sinking office chair usually has a worn gas lift or a loose height-control mechanism. Sit down slowly and mark the seat height with tape on the column. Wait ten minutes, then check whether the seat has dropped. Remove the seat cushion if needed, and inspect the lever, mounting plate, and visible cylinder for looseness or damage. Keep your fingers away from moving joints.

Test height locking before regular use. Raise the chair, release the lever, and apply your weight gradually. The seat should remain at the selected height without clicking, drifting, or dropping. Repeat this test at several positions. Use a firm, even surface during testing. A chair that holds briefly may still fail after repeated movement.

Check stability by rocking gently from side to side, then front to back. The base should stay flat, and the casters should roll without sticking. Do not test near stairs, wet floors, or sharp furniture edges. I once trusted a chair after one successful test, but it sank during a longer work session. That mistake changed my inspection routine. If the height keeps changing, replace the gas lift with a compatible part or have a qualified repair technician inspect it. Avoid drilling, heating, or forcing the cylinder. Those shortcuts can create serious hazards. Recheck every adjustment after installation, especially before extended daily use.

How to Fix an Office Chair That Keeps Sinking?

Test Height Locking and Stability Before Regular Use

Measure the seat height under a normal seated load, then repeat the check after several height-adjustment cycles. A properly locking chair should show minimal height loss and controlled side-to-side movement. If the seat drops noticeably or the base remains unstable, inspect the height lever, gas-lift cylinder, seat plate, and caster base before regular use.

FAQS

How can I tell whether an office chair’s gas lift has failed?

Remove your weight and press the height lever. If the seat still drops, the cylinder may have lost pressure. Check for oily residue, a bent piston, or unusual side-to-side movement.

Can a loose height lever imitate cylinder failure?

Yes. A loose control mechanism may stop the chair from locking correctly. Inspect the lever and mechanism before buying replacement parts. I once blamed the cylinder too quickly.

Why are durability tests more useful than appearance?

A clean cylinder can still fail under repeated stress. Durability testing includes loading, function checks, and stability evaluation. Some relevant tests use 100,000 seat cycles and 120,000 back cycles. These results do not guarantee identical performance from every chair.

How can I measure progressive seat sinking?

Measure the seat height before sitting. Sit for ten minutes, then measure again on a level floor. A drop of several centimeters suggests continuing pressure loss. Small changes matter.

Which cylinder measurements should I record before ordering?

Measure the body diameter, total length, exposed rod, and tapered ends. Record the distance between the mechanism and base. Calipers usually provide better accuracy than a ruler. I once measured only the visible shaft and ordered incorrectly.

What do DIN 4550 Class 3 and Class 4 indicate?

Class 3 often suits standard office loads. Class 4 generally offers a higher tested load range. The class alone does not guarantee compatibility. Check the load rating, stroke length, cone sizes, and mounting dimensions.

What parts must match a replacement gas lift?

The cylinder must fit the seat mechanism and five-star base firmly. Confirm both tapered connections before installation. Also check the chair’s rated load and available seat-height range. A part can look close and still fail.

How should I replace a failed gas cylinder safely?

Use a proper removal tool, eye protection, and a stable work surface. Install a compatible, safety-rated replacement. Do not drill, cut, heat, or open a pressurized cylinder. Test the chair on a level floor afterward.

What common mistake should I avoid when diagnosing the chair?

Do not trust a clean appearance as proof of good condition. A cylinder may pass visual inspection but fail under load. If measurements conflict, stop and recheck them. My clean-looking cylinder was not reliable evidence.

Conclusion

Why is my office chair sinking and how to fix it? The first step is to determine whether the gas lift has failed rather than assuming the problem is caused by the seat mechanism. Check for gradual height loss, unusual movement, or failure to remain locked, and compare the condition with recognized office-chair durability criteria such as ANSI/BIFMA X5.1. Next, measure the cylinder’s length, diameter, and connection points so you can select a compatible replacement rated as DIN 4550 Class 3 or Class 4.

For safe removal, detach the seat and base carefully, but never open, drill, heat, or disassemble the pressurized cylinder. Install a replacement lift with a load capacity suitable for the user and chair design, ensuring that all connections are fully seated. Before normal use, operate the height lever repeatedly, confirm that the seat stays at the selected level, and check for wobbling, uneven movement, or unusual sounds. If stability or fit remains uncertain, stop using the chair until it has been inspected.

Oliver

Oliver

Oliver is a seasoned marketing professional with a wealth of expertise in driving brand awareness and engagement. With a deep understanding of our company's product offerings, he consistently delivers high-quality content that enriches our professional blog. His insights not only shed light on......