How to Clean Velvet Living Room Chairs Safely?

Time:2026-09-08 Author:Madeline
0%

Velvet living room chairs add warmth, color, and a distinctive softness to any interior. However, their dense pile can reveal water marks, pressure lines, and uneven brushing very quickly. Learning how to clean velvet living room chairs safely requires patience, suitable products, and careful observation. A rushed cleaning attempt may leave the fabric looking worse than before.

This guide explains how to clean velvet living room chairs without ruining them, using methods suitable for common household stains and everyday dust. It covers vacuuming with a soft attachment, testing a hidden area, identifying the velvet type, and treating spills with minimal moisture. Professional upholstery experience shows that gentle blotting usually works better than aggressive rubbing. Keep the fabric almost dry.

Still, no method guarantees perfect results. Some older velvet may have weakened fibers, faded dyes, or previous water damage. That matters. Always check the manufacturer’s care label before applying anything. When the chair has valuable fabric, deep staining, or uncertain construction, a qualified upholstery cleaner is the safer choice. I have found that waiting too long can complicate stain removal, yet cleaning too quickly can spread the mark. That contradiction deserves attention. The safest process is slow, controlled, and based on the chair’s actual condition, not a generic online shortcut. Small details matter, including the direction of the pile, the cloth’s color, and how much pressure your hand applies.
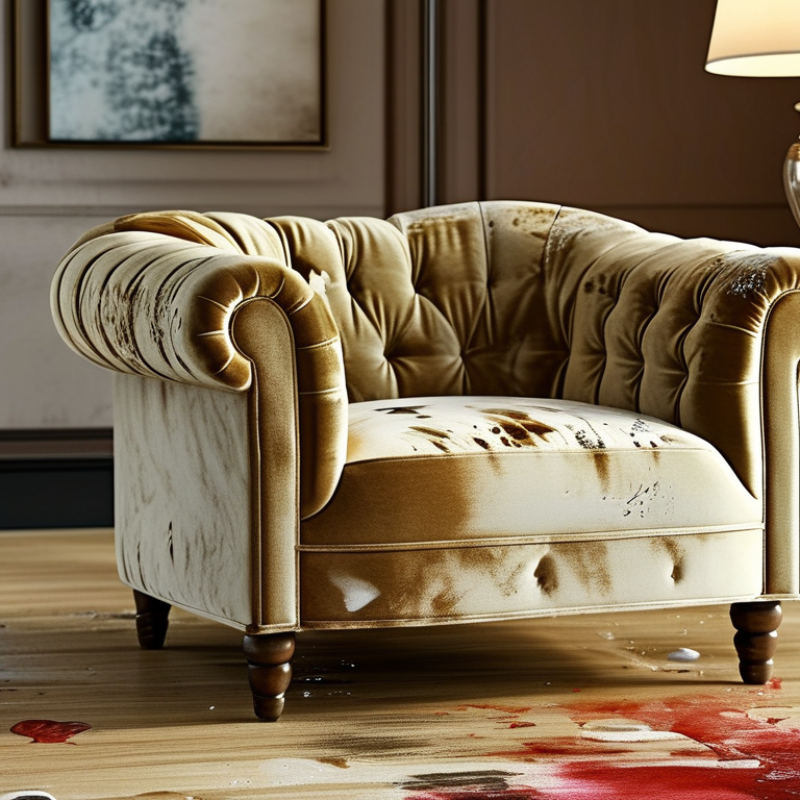
How to Clean Velvet Living Room Chairs Safely?

Identify the Velvet Type and Check the Manufacturer’s Care Label

How to Clean Velvet Living Room Chairs Safely?

Identify the velvet type before touching the fabric. Velvet may contain cotton, silk, rayon, or synthetic fibers. Each material reacts differently to moisture, heat, and pressure. Cotton velvet can absorb water quickly and develop dark rings. Silk velvet is especially delicate and may need professional care. Synthetic velvet usually tolerates gentle cleaning better, but it is not automatically stain-proof.

Check the manufacturer’s care label, usually beneath the seat or frame. Look for symbols such as W, S, WS, or X. A W code generally permits water-based upholstery cleaning. An S code calls for a solvent-based method. WS may allow either method, while X usually means vacuuming only or professional cleaning. Do not guess. If the label is missing, contact the furniture maker or choose professional advice before applying liquid.

Vacuum with a soft upholstery attachment, following the pile direction. Test any cleaner on a hidden seam first. Wait until the area dries fully. I once used too much water on a velvet cushion, and the nap dried unevenly. That mistake taught me to work with minimal moisture. Blot gently with a white cloth instead of rubbing. Use less water. For crushed, discolored, or unknown velvet, stop there. A qualified upholstery cleaner can assess the fiber and prevent a small mark from becoming permanent.

How to Clean Velvet Living Room Chairs Safely

Identify the velvet type and check the manufacturer’s care label before applying any cleaner.

The chart shows the number of liquid-cleaning options indicated by common upholstery care codes: W allows water-based cleaning, S allows solvent-based cleaning, WS allows either method, and X allows vacuuming only. Always test an inconspicuous area first and follow the chair’s specific care label.

Gather Suitable Cleaning Tools and Test for Colorfastness

How to Clean Velvet Living Room Chairs Safely?

Gather suitable tools before touching the velvet. Use a vacuum with a clean, soft upholstery attachment. Keep suction low to protect the fabric’s raised pile. A soft velvet brush can lift dust from seams and button details. Prepare two white, lint-free cloths, distilled water, and a small bowl. If needed, add one drop of mild detergent. Strong cleaners may flatten the pile or change its color.

The part I would not skip is colorfastness testing. Choose a hidden area under the chair or behind its skirt. Dampen a white cloth lightly, then press it against the fabric for ten seconds. Do not rub. Check the cloth for transferred color and watch the test spot as it dries. Wait several hours, because some discoloration appears later. No transfer is encouraging, but it is not a guarantee. Velvet may react differently across seams, cushions, and sun-faded sections.

Avoid soaking the upholstery. Moisture can leave rings, stiff patches, or unpleasant odors inside the padding. If the test succeeds, blot a small mark from its outer edge toward the center. Use very little liquid. Dry the area with moving air, not direct heat. The pile may look uneven afterward. A gentle brush can help, although brushing too early can create another problem. Test slowly. Your chair is not a washable towel.

Remove Dust and Treat Stains Without Soaking the Fabric

How to Clean Velvet Living Room Chairs Safely?

Velvet traps dust between its short fibers, so begin with a soft upholstery nozzle. The U.S. Environmental Protection Agency reports that indoor particle levels may reach two to five times outdoor levels, and sometimes 100 times higher. Remove cushions when possible. Vacuum slowly in the nap’s direction, never pressing hard against the pile. Use a clean, soft brush for seams and button areas. Do not shake the chair indoors.

Treat stains quickly, but avoid soaking the fabric. Blot fresh spills with a white, absorbent cloth. Press gently. Never scrub. Check the care label before adding moisture, because some velvet uses delicate synthetic or natural fibers. For water-safe fabric, slightly dampen a cloth with distilled water and test an unseen area first. Apply moisture to the cloth, not directly to the chair. A small amount is enough. IICRC S300 guidance emphasizes fiber identification, pretesting, and controlled cleaning application for upholstery. That discipline matters with velvet.

For greasy marks, use only a suitable upholstery solvent when the label permits it. Work from the stain’s outer edge toward the center. Let the area dry naturally, away from heaters and strong sunlight. Then restore the nap with a soft brush. I would not trust every online cleaning trick; even a careful method can leave a pale ring. If the test patch changes color or texture, stop and contact a qualified upholstery cleaner.

How to Clean Velvet Living Room Chairs Safely? — Remove Dust and Treat Stains Without Soaking the Fabric
Step Cleaning Task Recommended Method and Supplies Typical Time What to Avoid Risk Level
1 Check the care label Confirm whether the upholstery is cotton, polyester, rayon, silk, or a blend. Follow the label’s cleaning code: W means water-based products may be suitable, S means solvent-based cleaning only, WS allows either method, and X generally means vacuuming or professional cleaning only. 2–5 minutes Do not assume that all velvet can be cleaned with water. Do not remove or ignore the manufacturer’s care instructions. Low
2 Test a hidden area Apply a small amount of the intended cleaner to an inconspicuous section, such as the back edge or underside. Wait until it dries, then check for color transfer, water rings, pile flattening, stiffness, or texture changes. 15–30 minutes Do not continue if the color bleeds, the fabric becomes shiny, or the pile feels different after drying. Low
3 Remove loose dust Use a vacuum with an upholstery attachment and low suction. Move gently in the direction of the velvet pile. A soft, clean clothes brush may be used for light surface dust when vacuuming is not practical. 5–10 minutes Avoid high suction, aggressive brushing, rotating brush heads, and rubbing against the pile, which can crush or distort the nap. Low
4 Blot fresh spills Immediately lift solids with a spoon or dull edge. Place a clean, white, absorbent cloth over the liquid and press gently. Replace the cloth as it becomes damp. Work from the outer edge toward the center. 5–15 minutes Do not scrub, wring, spread the spill, or press so hard that liquid reaches the cushion filling. Low
5 Treat water-based stains For upholstery marked W or WS, use a barely damp white cloth with a small amount of mild, pH-neutral upholstery cleaner. Apply the cleaner to the cloth rather than pouring it onto the velvet, then blot lightly. 10–20 minutes Avoid soaking, foaming heavily, using colored towels, or applying household bleach, strong detergents, or undiluted cleaners. Medium
6 Treat oil or grease stains For upholstery marked S or WS, remove excess residue with a dry spoon or cloth. Use only a solvent specifically labeled for upholstery, following its instructions and ventilation requirements. Blot from the outside inward. 10–30 minutes Do not use water on an S-coded fabric, mix solvents, smoke nearby, or apply solvent without a hidden-area test. High
7 Dry the treated area Press the area with a dry, white towel to remove surface moisture. Allow the chair to air-dry naturally in a well-ventilated room. Keep the pile undisturbed until completely dry. Several hours Do not use a hot hair dryer, steam cleaner, heater, or direct intense sunlight, as heat and moisture can cause marks or pile changes. Medium
8 Restore the velvet pile Once fully dry, use a soft velvet or upholstery brush with very light strokes in the original pile direction. Stop if the fabric looks shiny, flattened, or uneven. 2–5 minutes Avoid brushing wet velvet, pressing hard, or repeatedly working the same spot. Low
9 Handle persistent stains If a stain remains after one careful treatment, stop repeated spot cleaning. Contact a qualified upholstery cleaner, especially for antique, silk-blend, rayon, non-removable, or X-coded velvet. After initial drying Do not keep adding cleaner or water. Repeated treatment can create rings, discoloration, shrinkage, or permanent pile damage. Low
Important: Velvet fibers and upholstery constructions differ. Always follow the care label, perform a hidden-area test, use the least amount of moisture possible, and never saturate the fabric or cushion.

Clean the Velvet Surface Safely Using Gentle, Even Strokes

How to Clean Velvet Living Room Chairs Safely?

Before cleaning, check the chair’s care label and inspect the velvet in natural light. Dust often hides between the fibers. Use a vacuum with an upholstery attachment and low suction. Keep the nozzle slightly above the surface when possible. Strong suction can flatten delicate velvet.

Test any moisture on a hidden area first. Mix a small amount of mild detergent with cool water, then dampen a white microfiber cloth. Do not soak it. Work across the velvet using gentle, even strokes, following the direction of the pile. Short, calm movements are safer than aggressive rubbing. Blot marks instead of scrubbing them. Scrubbing can create a shiny patch. I have learned that working too long on one stain may make the damage more visible. Stop, let the area dry, and reassess it. This pause matters.

After cleaning, allow the chair to dry naturally with good airflow. Avoid direct heat, which may stiffen or discolor the fibers. When the surface is fully dry, lightly brush the pile in one direction with a soft velvet brush. If water rings remain, uneven moisture may be the cause. Some velvet fabrics react unpredictably, especially older or silk-based upholstery. For valuable chairs, deep stains, or unknown fabric types, consult a qualified upholstery cleaner before applying more water.

Dry, Brush, and Inspect the Chairs After Cleaning

Cleaning velvet living room chairs safely begins with patience. Check the care label before touching the fabric. Test your method on a hidden area first. A small white cloth can reveal color transfer. Vacuum loose dust with a soft upholstery attachment, using light passes. Never press hard. For a fresh mark, blot from the outside toward the center. Rubbing can flatten velvet fibers and spread the stain. Use only a small amount of suitable upholstery cleaner. Too much moisture may leave dark rings.

Tips: Keep the chair slightly damp, never soaked. Open a window for steady airflow. Avoid direct heat from hairdryers or radiators. It can distort the pile. I once dried velvet too quickly, and one area looked shinier than the rest. That mistake was avoidable.

After cleaning, let the chair dry completely before brushing it. Moist fibers can change direction easily. Use a clean, soft velvet brush and follow the original pile direction. Make short, gentle strokes. Do not force crushed areas back into shape. Wait, then try again. Inspect the seat, seams, arms, and front edge under natural light. Look for water marks, cleaner residue, color changes, or uneven texture. Feel the fabric with your fingertips. A stiff patch may indicate leftover product. If the surface still looks inconsistent, stop brushing and allow more drying time. Some marks need professional upholstery care rather than repeated home cleaning.

FAQS

: How can I identify the velvet type?

: Check whether it contains cotton, silk, rayon, or synthetic fibers. Different fibers react differently. Silk velvet needs extra caution. Synthetic velvet often tolerates gentle cleaning better.

What do the care-label codes mean?

W usually permits water-based upholstery cleaning. S usually requires a solvent-based method. WS may allow either method. X often means vacuuming only or professional cleaning. Do not guess.

What should I do if the care label is missing?

Avoid applying liquid immediately. Contact the furniture maker or seek qualified upholstery advice. Unknown velvet can react badly to moisture.

How should I remove dust from a velvet chair?

Use a clean, soft upholstery attachment with low suction. Follow the pile direction. Keep the nozzle slightly above delicate areas. A soft brush can clean seams and button details.

How do I test a cleaner safely?

Choose a hidden seam or area beneath the chair. Press a lightly damp white cloth against it for ten seconds. Do not rub. Wait several hours and check for transferred color or delayed discoloration.

What cleaning mixture is suitable for a small mark?

Use cool water with one drop of mild detergent, if the fabric allows water. Dampen a white cloth lightly. Use very little liquid. Never soak the upholstery.

How should I clean the visible surface?

Blot the mark from its outer edge toward the center. Use short, gentle strokes following the pile direction. Avoid scrubbing. Scrubbing can create a shiny patch.

How should the chair dry afterward?

Let it dry naturally with good airflow. Avoid direct heat, which may stiffen or discolor fibers. Brush the pile lightly only after it is fully dry.

What if water rings or uneven texture remain?

Stop adding moisture. Uneven drying may have affected the pile or padding. I once used too much water and made a cushion worse. A qualified cleaner can assess the damage.

Conclusion

Cleaning velvet living room chairs safely begins with identifying the type of velvet and reading the manufacturer’s care label. Different fabrics may require different methods, so always follow the recommended instructions. Prepare gentle tools such as a soft brush, vacuum with an upholstery attachment, clean white cloths, and a suitable mild cleaning solution. Before treating the chair, test the solution on a hidden area to check for color bleeding or texture changes.

To understand how to clean velvet living room chairs without ruining them, remove loose dust first and treat stains carefully without soaking the fabric. Use gentle, even strokes in the direction of the pile, applying minimal moisture and avoiding excessive rubbing. After cleaning, allow the velvet to air-dry completely in a well-ventilated space. Once dry, lightly brush the surface to restore its texture, then inspect the chair for remaining marks or uneven areas.

Madeline

Madeline

Madeline is a dedicated marketing professional with a wealth of expertise in our company's core offerings. With a keen understanding of the industry, she brings a unique perspective to her role, consistently delivering high-quality content that highlights the superior aspects of our products. As......